Workbench
The Workbench page is used to create and modify a lab’s topology and to interact with the lab simulation. To open a lab in the Workbench, find the lab in the Dashboard page and, depending on the Dashboard’s view, click on the tile (in tiles view) or the Open Lab link or lab preview (in list view) associated with the lab.
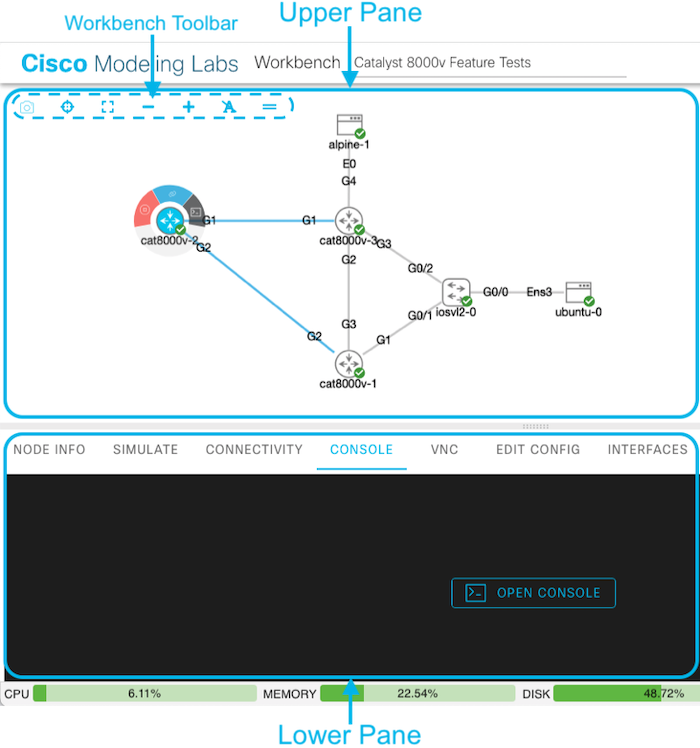
The Workbench page is divided into an upper and lower pane. The upper pane is a graphical canvas where you can create, modify, and interact with the lab topology. The lower pane provides a tabbed view of different details and actions for the selected topology element. If no element is selected in the lab–for example, when you click on the canvas background in the upper pane–the tabs in the lower pane show information about the topology itself. If you select a node or link in the upper pane, the tabs and details in the lower pane will show information about the selected topology element.
Workbench Toolbar
The workbench toolbar at the top-left of the upper pane of the Workbench provides buttons for the following actions:
Toolbar Button |
Description |
|---|---|
Take Screenshot |
Takes screenshot of canvas with current color scheme. |
Center Canvas |
Center the topology in the canvas. |
Fit Canvas |
Fit the topology to the current canvas dimensions. |
Zoom Out |
Zoom out of the topology in the canvas. For a continuous zoom, click and hold. |
Zoom In |
Zoom in on the topology in the canvas. For a continuous zoom, click and hold. |
Show Link Labels |
Toggle to enable / disable the display of the interface names on each side of the link in the canvas. |
Enable bundling links between nodes |
Toggles the canvas-wide preference for how to display multiple links between the same two nodes. Enables / disables bundling of links for all existing nodes in the lab. See also See Hiding Links. |
Other Canvas Actions
In addition to the actions available on the toolbar, the Workbench provides double click actions for hiding links in the canvas. See Hiding Links.