Configuring the Breakout Tool
The Breakout Tool may be run entirely from the command line, specifying all settings using the tool’s command line options. For most users, we recommend that you configure the Breakout Tool with the provided web interface. The following section describes how to configure the tool for the first time and save all settings for future use.
The Breakout Tool is already installed on the local machine. You have opened a local terminal application to the Breakout Tool’s installation directory.
Procedure
Start one or more labs from the Dashboard or the Workbench.
Run the Breakout Tool and specify the ui command.
The exact command will depend on your platform. For example, on Windows, it would be:
breakout-windows-x86_amd64 ui
On Mac OS X, it would be:
./breakout-macos-x86_amd64 ui
Wait until the Breakout Tool’s web UI is ready and the command outputs a message indicating that it is running and “serving UI/API”.
On first launch, the tool will try to connect to an unspecified host, and you must wait until the connection times out.

CLI output that indicates the Breakout Tool’s web UI is ready
With web UI running, open a supported web browser and navigate to the Breakout Tool’s configuration page, http://localhost:8080 by default.
The Breakout UI will be shown in the browser.
Click Configuration at the top of the Breakout UI.
Enter the IP Address or hostname of your CML installation in the Controller Address field.
Enter the username and password that you use to log into the CML web interface in the Username and Password fields.
The Breakout Tool will only have access to simulations that the specified username can access. On a multi-user system, if you want to connect to a particular lab simulation, be sure to use the credentials of a user who can see that lab in the Dashboard.
Click the Save button.
The configuration settings are saved to the config.yaml file in the
Breakout Tool’s installation directory.
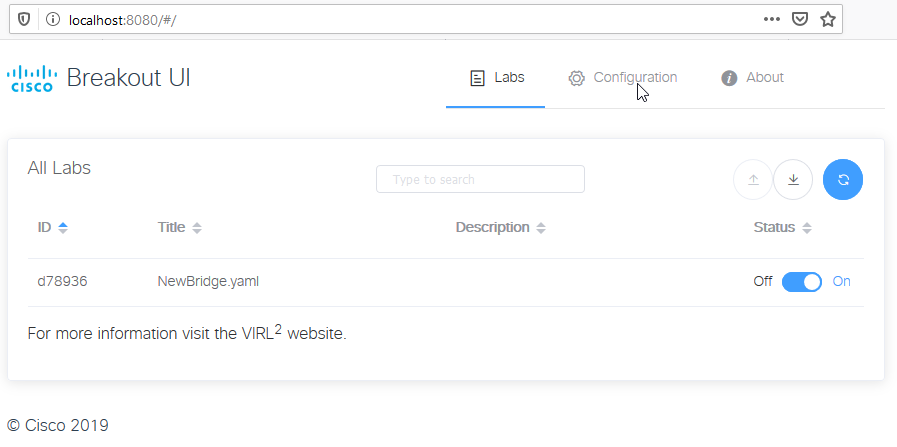
Click Labs at the top of the Breakout UI.
After changing the configuration, you may need to click the Refresh button at the top of the All Labs page to refresh the list of labs.

Breakout UI’s All Labs page
All running labs are displayed on the Labs page of the Breakout UI.
Since the Breakout Tool’s configuration settings are stored to the
config.yaml file, they will be used the next time you run the Breakout
UI. You shouldn’t have to provide the controller address or user
credentials on the Configuration page of the Breakout UI in the future
unless those values change.
You’re now ready to use the Breakout Tool to connect to nodes in your simulation.