Bare Metal Installation
Follow these instructions for a bare metal deployment of CML on a dedicated server. The bare metal installation process is semi-automated, similar to the OVA deployment as a CML VM. You should have already downloaded a copy of the CML controller ISO file and refplat ISO file.
The server where you plan to install CML must be configured for UEFI boot mode. Secure boot is currently not supported and must be disabled.
Procedure
The CML controller ISO file is a bootable installer disc.
With a UCS Server, you can use the CIMC’s KVM console to mount the ISO file remotely as a mapped CD/DVD drive.
Slow transfer speeds or network disruptions during the installation process can cause the installation to fail.
We recommend uploading the controller ISO file to a datastore that is co-located with the server. For example, copying files from an ISO file on your local system to a server in your data center across a slow VPN connection will likely lead to a failed installation.
There is also a bug in CIMC that makes the process of copying files from the mapped ISO file to the disk take much longer. The bug affects only HTML5-based KVM console. If your server is running an affected CIMC version, either upgrade to an unaffected CIMC version or use CIMC’s Java-based console.
Boot your server from the installer disc. With CIMC, you would choose UEFI and use the KVM-mapped DVD option.
The server will use its normally-configured boot order. Ensure that the server is set to boot from the hard drive where CML is now installed.
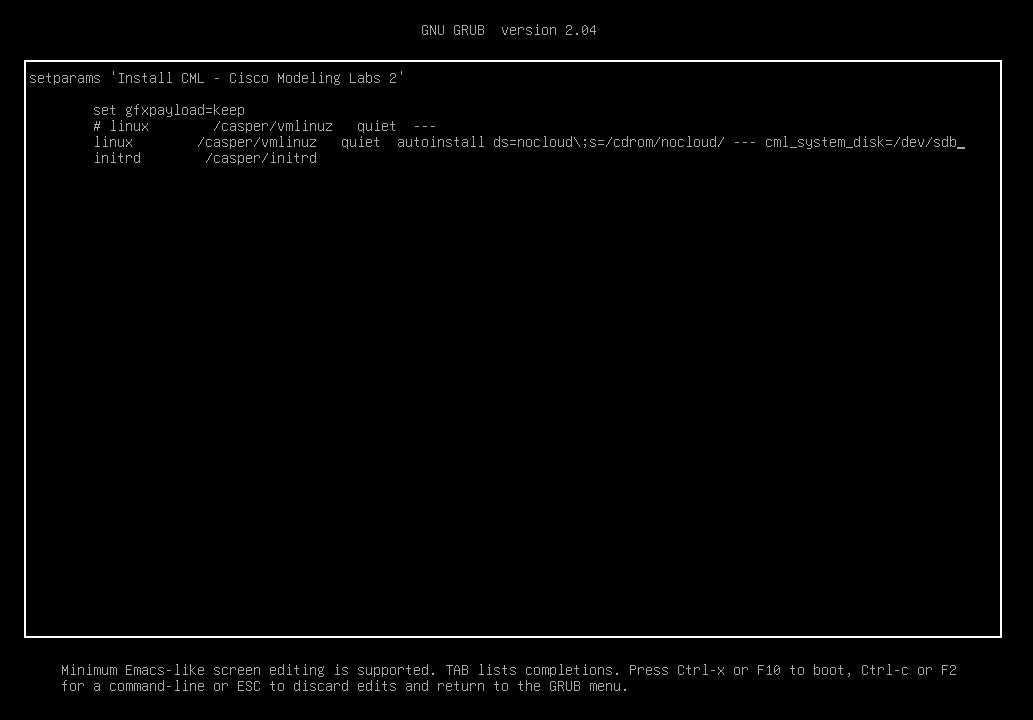
By default, CML will be installed on the first available disk device. Supported disk devices
are /dev/sda, /dev/nvme0n1, /dev/vda, and /dev/hda. To override this order or to select a different
disk device, add kernel parameter cml_system_disk=/dev/XXX in GRUB prior to boot.

Configuring a custom disk device
Wait until the installation finishes.
When the installation process finishes, it will “eject” the ISO and reboot. When the server reboots, we recommend that you power it down or otherwise stop the boot process until you can mount the refplat ISO file. See the next step.
Again, using the CIMC KVM console, mount the refplat ISO file remotely as a mapped CD/DVD drive. Do not set your system to boot from the mapped CD/DVD drive. Boot from the hard disk to start your new CML instance.
To complete the initial set-up script for the CML installation, you will need access to the server’s console so that you can configure the initial CML accounts and the CML server’s networking. You may work on the server’s local console to complete these steps, or you may use the CIMC virtual KVM console.
Your CML server will require that the reference platforms are accessible during the initial set-up steps. If you forgot to mount the refplat ISO file before rebooting the server, you can do it during the installation. You may need to press Retry multiple times before the refplat ISO is mounted, and the initial set-up script recognizes that the reference platforms are available.
Once you have mounted the refplat ISO and rebooted your server, you are ready to complete the initial system configuration. Continue the installation with Initial Set-up. Remember to follow the instructions on Copy the Refplat ISO to Disk after you license your CML server.