Running a Packet Capture
You can start a packet capture for any running link. By default, the packet capture will capture 50 packets of any type and then stop.
Warning
You can currently only have one packet capture per link. As soon as you start a new capture, any previous packet capture associated with the link is discarded.
Be sure to download the packet capture before you stop the link. The packet capture is discarded when you stop the link or the lab.
Procedure
In the Workbench, select a running link.
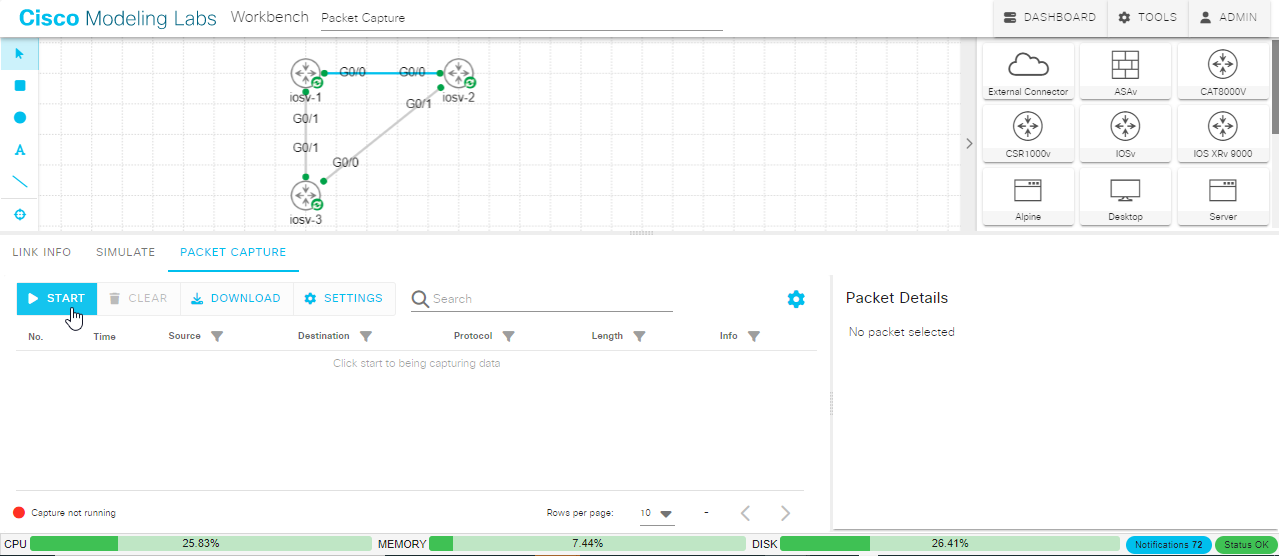
In the lower pane, click the Packet Capture tab.

The Packet Capture Pane
If the link is not running, the Packet Capture pane will only show the message “Please start the link first to capture packets.” In that case, the lab or the link itself is not running. Ensure that the lab is running and then click the Simulate tab for the link. Click Start Link to start the link. Once the link has started, click the Packet Capture tab again.
(Optional) In the Packet Capture pane, click the Settings button to show the settings that control which packets and how many packets are captured.
(Optional) Change the packet capture settings.
Setting |
Default |
Description |
|---|---|---|
Max Packets |
50 |
The number of packets to capture. CML will capture packets on the link until this number of packets have been captured. |
Max Time |
None (i.e., unlimited) |
The length of time (in seconds) to capture packets. CML will capture packets on the link until this many seconds have elapsed. |
BPF |
None |
A Berkley Packet filter (BPF) that restricts which packets are captured. CML will only capture the packets that match this filter. If you set both the max packets and a BPF filter, only the packets that match this filter will count toward the max packets limit. |
BPF Templates |
Not Applicable |
This field is not a setting: it simply provides several pre-defined templates to get you started with customizing the BPF setting.
For example, if you choose the ip (src) template, the BPF field will
be changed to |
You must specify a vaule for either Max Packets or Max Time. If you set both fields, the packet capture will stop at whichever limit is reached first.
If you cannot modify any of the settings, confirm that you are not currently running a packet capture on the link. You may view the settings for a running packet capture, but you cannot change the settings until the capture capture is complete or is stopped.
Click Save to save the settings and return to the packet summary table.
Click Start to start capturing packets on the link.
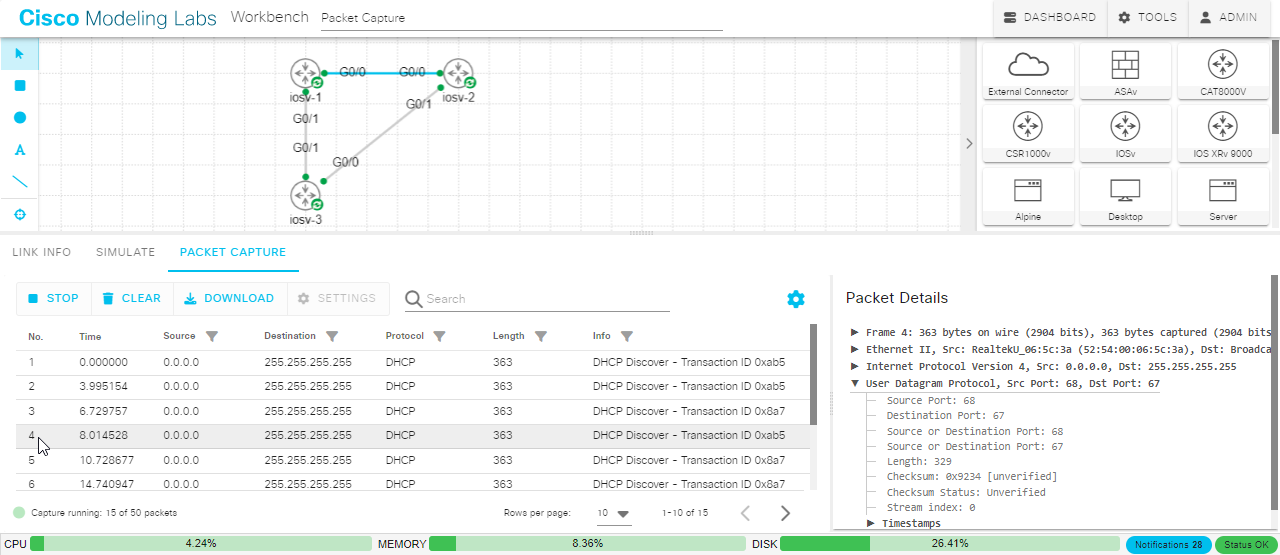
While the packet capture is running, CML will add packets to the packet summary table as they are captured. The Start button switches into a Stop button.
(Optional) Click a row in the packet summary table to select a packet.
The Packet Details pane on the right shows the contents of the selected packet.

Packet Capture Details
(Optional) In the Packet Details pane, click the sections to reveal additional details about the selected packet.
Once the packet capture reaches one of the limits that you specified in the settings, the packet capture stops.
Optionally, you may click the Stop button to stop the packet capture before it reaches one of those limits.
The Stop button switches back into a Start button. CML stops adding new packets to the summary table.
Don’t forget to download the packet capture before you stop the lab or start a new packet capture on the same link.
Related Topics