Mapping SNMP OIDs to YANG XPaths
Network telemetry is traditionally accessed by management tooling that consumes SNMP MIBs. YANG models are definitions of network management APIs that can also be consumed by tooling to achieve the same telemetry goals. Many network management systems based off of SNMP MIBS are currently in place. In order to smoothly transition from a MIB based management system to a YANG model-based system requires knowledge of where the two intersect. This has proven to be a tedious endeavor which involves manually mapping individual MIB OIDs to its YANG model equivalency. This YANG Suite plugin will provide a layer between the MIB and YANG data that presents mapping to the user.
Before Using the Plugin
Set up device to accept SNMP requests from the yangsuite-coverage plugin (please refer to your device configuration manual for details). Two ways to allow yangsuite to communicate with device/snmp-server:
Add a community string with “ro” option (read-only mode, most secure):
yangsuite-coverage does not need write access.
Add a new user with password:
Create a new SNMP user group with security level “v3”.
Create a new user:
Username must be the same as the device’s ssh username.
Make sure SNMP’s user authentication method is “MD5”.
Add user to the newly created SNMP user group with security level “v3”.
Set up device to accept incoming NETCONF requests from yangsuite-coverage plugin.
Note: use default ports for NETCONF communication.
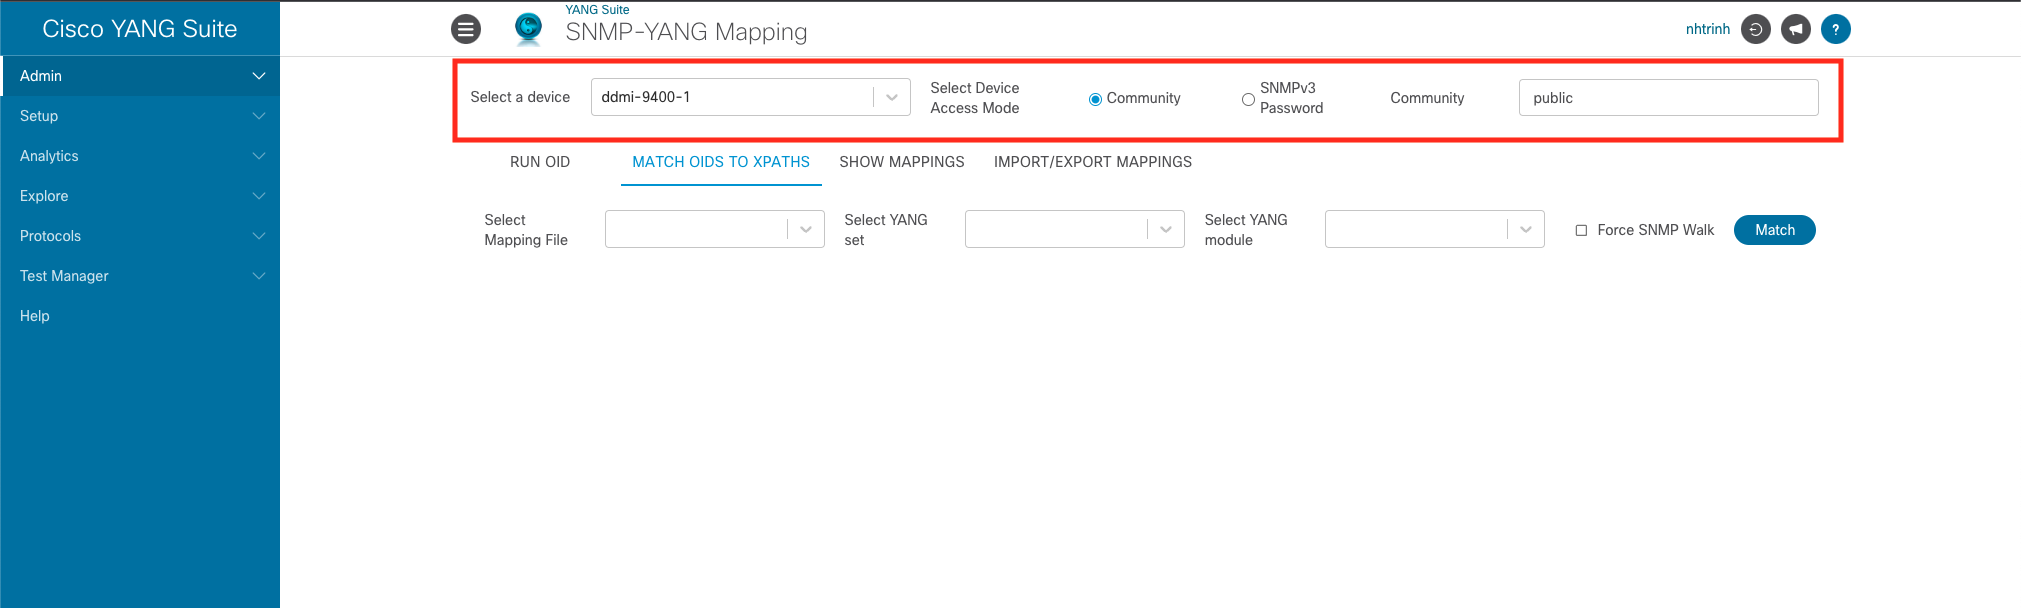
Selecting Device and Specifying Access
Before using other functionalities in the plugin, device and device access mode must be selected. Please follow these steps:
Select device you have set up before using the plugin
Select device access mode from two options:
Community:
Choose this option if you set up community string with “ro” mode in the device.
Fill in the text input box
SNMPv3 Password:
Choose this option if you set up a user with a “md5” password in the device.
Fill in the text input box
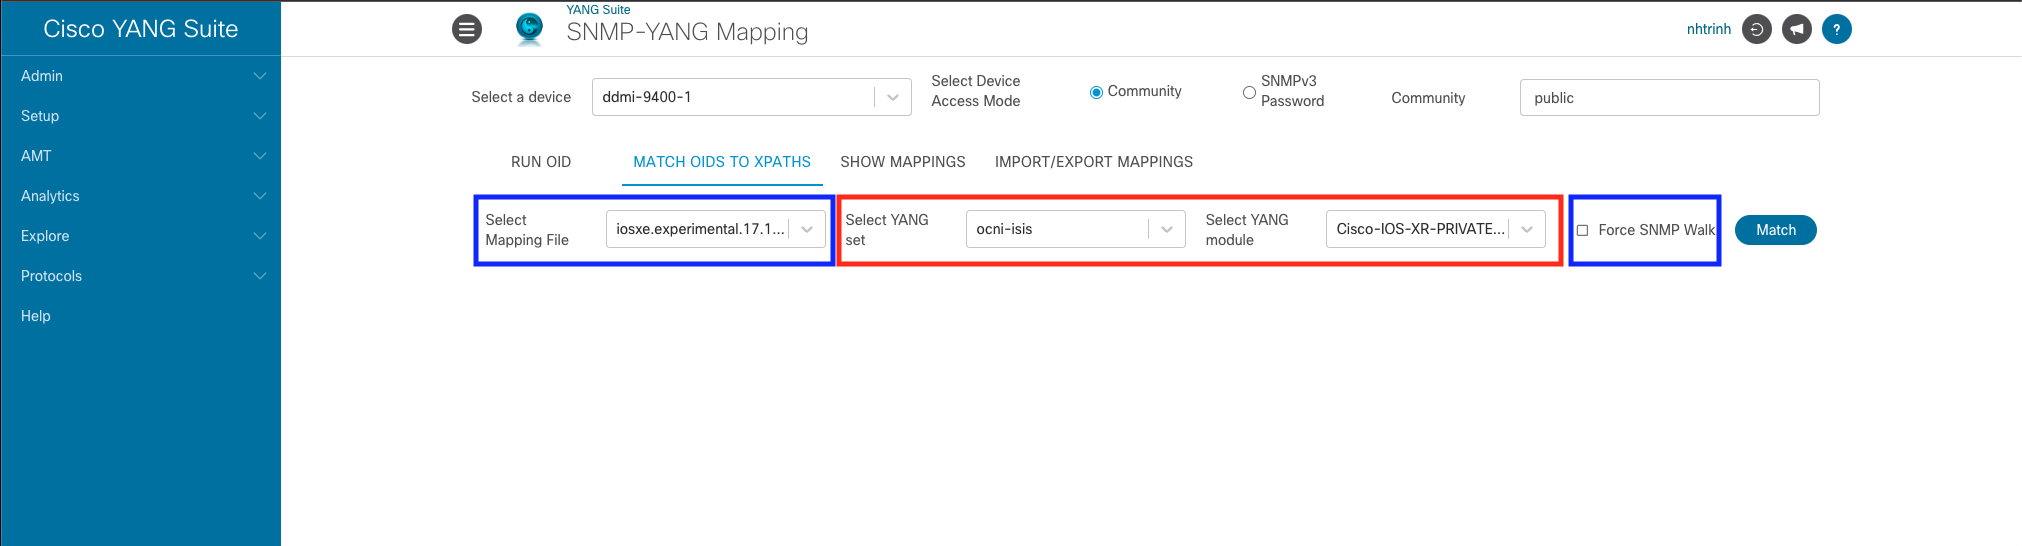
Match OIDs to XPaths
This functionality will acquire all the existing OIDs on the device, attempt to match OIDs to one XPath that exists in the selected YANG module. If an OID cannot be matched to an XPath, the YANG path field under the OID field will be blank. Match OIDs to XPaths is designed to save user time from manually doing the mapping work. To use the functionality, click on “Match OIDs to XPaths” and follow these steps:
Select the “Match OIDs to XPaths” tab.
Please provide inputs for all the required fields (labeled by red boxes):
Choose a YANG set from “Select a YANG set” dropdown.
Choose a YANG module from the selected YANG set using the “Select YANG module” dropdown.
Review and fill in these non-required fields if needed (labeled by blue boxes):
Choose a file from “Select a mapping file” dropdown if you wish to append new OIDs to XPath matches to that selected mapping file. Plugin stores OIDs to XPath matches in a new CSV file by default.
Click on “Force SNMP Walk” if you wish to get a fresh list of OIDs from the device for matching. Plugin uses a cached list of OIDs from the last “Match OIDs to XPaths” run(s) by default.
Click on “Match” button, and wait for the list of OIDs and XPaths to populate below the form.
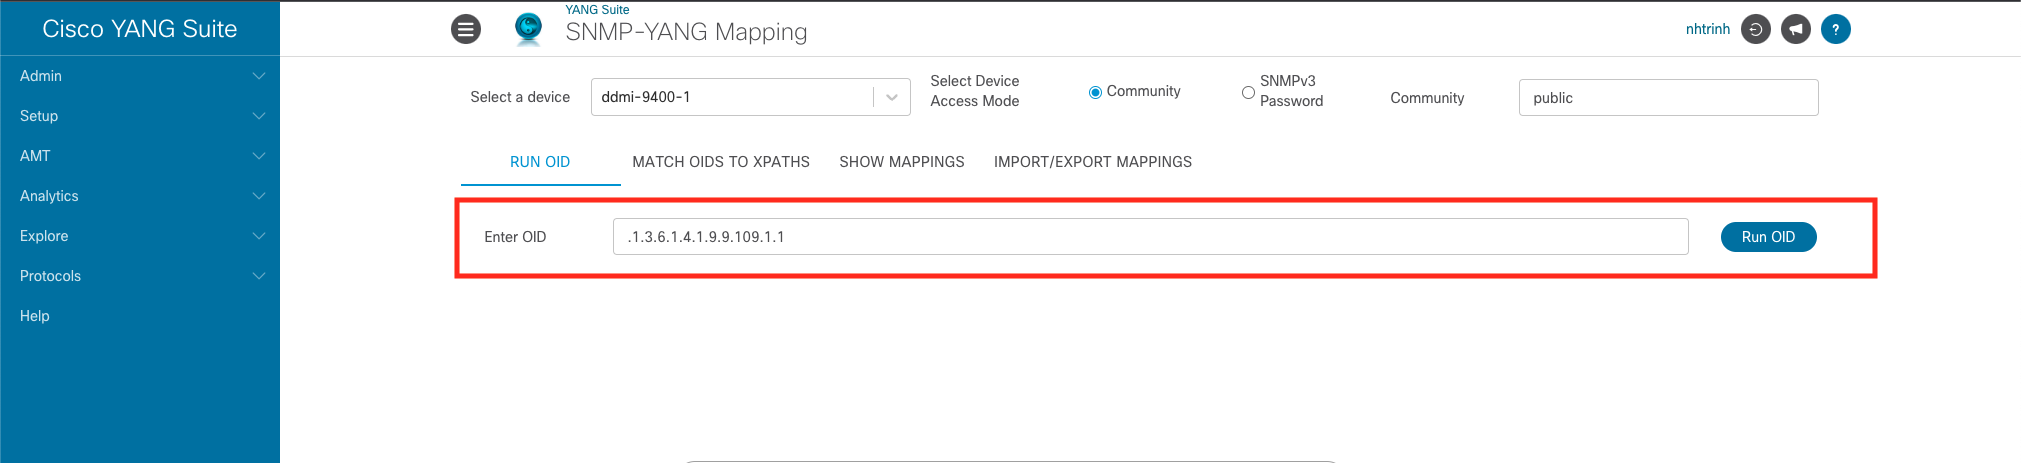
Run OID
This functionality is to query the device for the resource using the specified OI- If the OID has children, the children of the OID will be queried for values and all the values will be displayed in a dialog box. Steps outlined below will be needed to run OID and get results from device:
Select the “Run OID” tab.
Enter an OID in the “Enter OID” field.
Important: please make sure OID is entered in correctly or value(s) will not be displayed.
Click Run OID and wait for dialog box with results to come up.
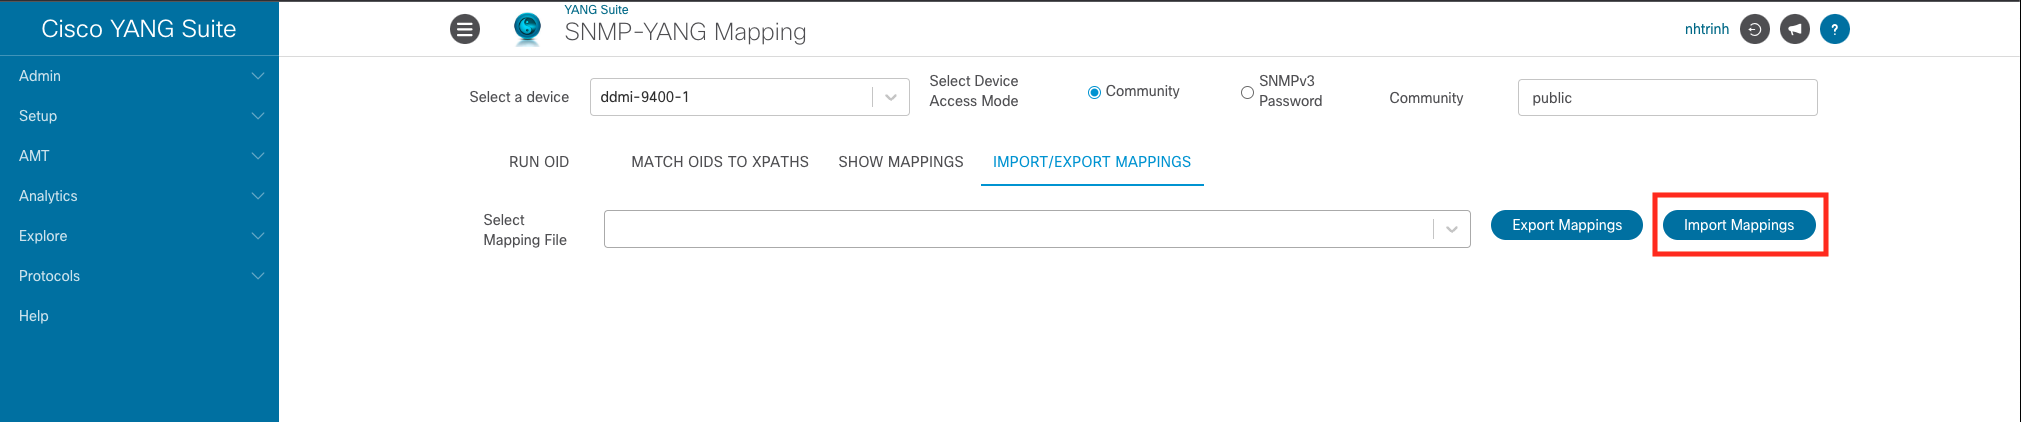
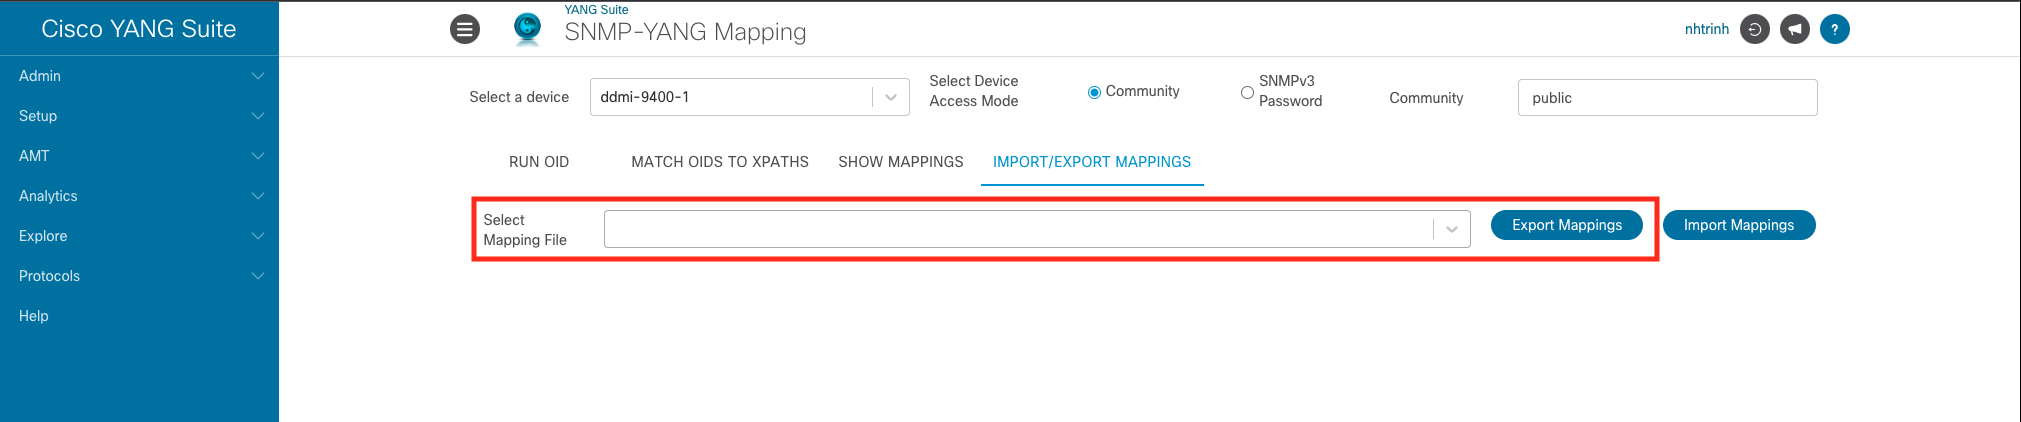
Import Mappings
This feature can be used to import existing mappings in a .csv file to help you quickly bring up mappings and start working again. To import mappings, follow the steps below:
Select the “Import/Export Mappings” tab.
Choose “Import Mappings” button.
Select the desired .csv file, click “Load” and wait for the mappings to populate.
Go to “Show Mappings” tab.
Select a mapping file and click on “Show Mappings” to load the mappings in the CSV file.
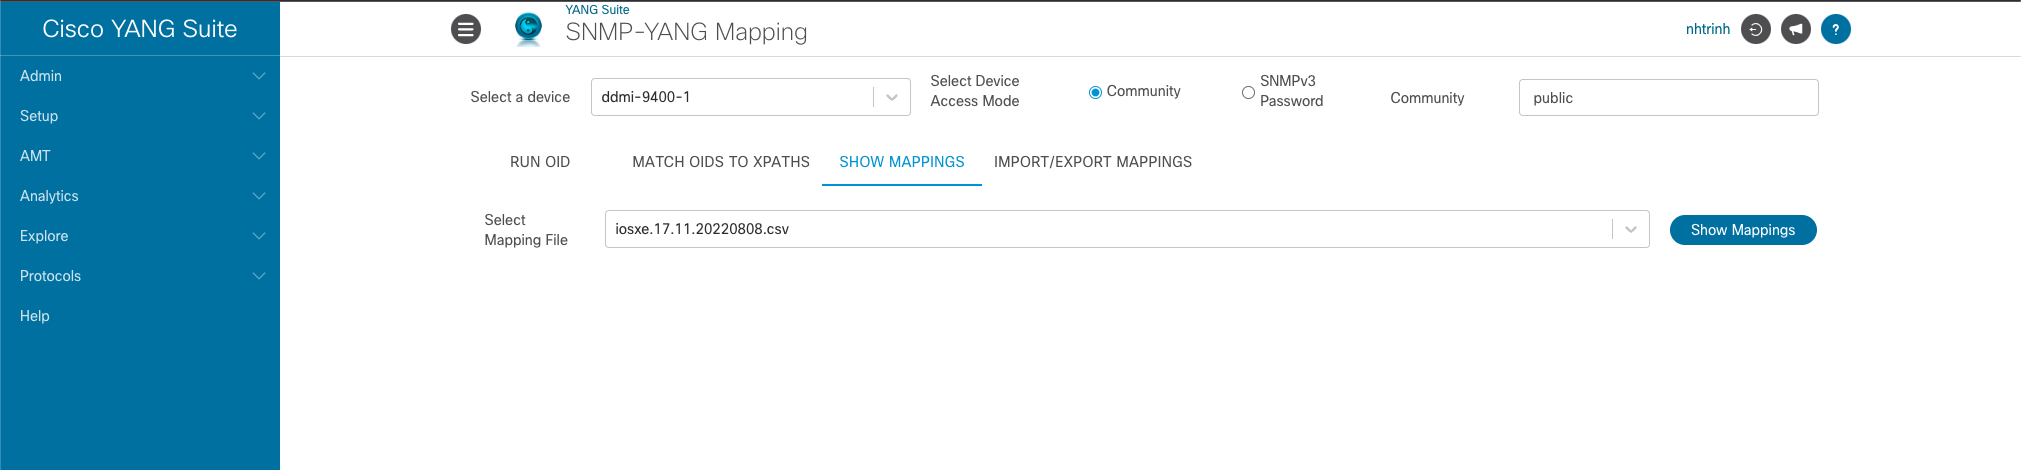
Show Mappings
This functionality will quickly bring up mappings saved in a .csv file. To show mappings, follow the steps below:
Select the “Show Mappings” tab.
Select a file from “Select mapping file” dropdown.
Select the desired file, click “Show Mappings” and wait for the mappings to populate.
Export Mappings
This functionality will allow you to get a copy of the mapped file saved in the YANG Suite data directory. Please follow the steps below:
Select the “Import/Export Mappings” tab.
Select a file from “Select a mapping file” dropdown.
Choose “Export Mappings” button.
A copy of the mapped .csv file following the format will be exported to your browser’s configured downloads directory.
Results
When the mapping process is done, the mappings (Readable OID and XPaths) will populate on the page. The populated mappings are based on the live device as well as the mappings from the plugin’s local repository of mapppings. The OIDs that do not have a YANG XPath matched to them are not “mapped” by the results gathered from the device or from previous manual mapping work, therefore the OIDs need manual mapping.
Note: mapped files are saved in <YANG Suite data directory>/users/<username>/mibyang_mappings.